616-816-BATH
Signed in as:
filler@godaddy.com
616-816-BATH
Signed in as:
filler@godaddy.com
Description: A liquid waterproofing membrane is a flexible, rubberized coating applied to the shower area with a brush or roller.
Advantages:
Easy to apply and can conform to complex shapes.
Seamless application, reducing potential points of failure.
Quick drying and ready for tile installation.
Steps:
Clean and prepare the substrate.
Apply a primer if required.
Apply the liquid membrane evenly, ensuring full coverage.
Allow the membrane to cure as per manufacturer instructions before tiling.
Materials:
Liquid membrane (e.g., Red Gard, Hydro Ban).
Brush or roller.
Description: Sheet membranes are pre-formed sheets of waterproof material that are adhered to the shower substrate.
Advantages:
Consistent thickness and durability. Provides a strong, impermeable barrier. Suitable for both walls and floors.
Steps:
Prepare and clean the surface. Apply a thin-set mortar or adhesive. Embed the sheet membrane into the adhesive, smoothing out air bubbles. Seal seams with compatible adhesive or seam tape. Let the adhesive set before tiling.
Materials:
Sheet membrane (e.g., Schluter Kerdi, NobleSeal TS). Thin-set mortar or appropriate adhesive. Seam tape (if required).
Description: Cementitious waterproofing involves using a cement-based waterproof coating. This method is often used for masonry or concrete surfaces.
Advantages: Durable and long-lasting. Easy to apply and readily available. Can be painted or tiled over once cured.
Steps: Clean and dampen the surface to be treated. Mix the cementitious waterproofing compound according to manufacturer instructions. Apply the first coat with a brush or trowel. Allow the first coat to dry, then apply a second coat. Let the coating cure completely before proceeding with tiling.
Materials: Cementitious waterproofing compound. Brush or trowel.
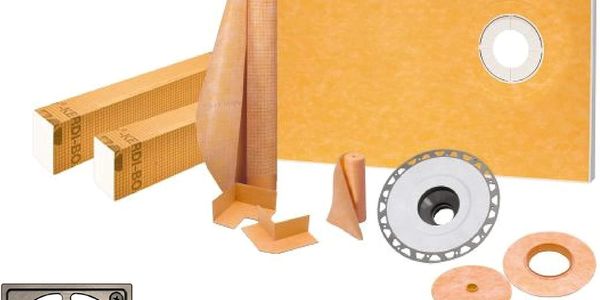
Description: Foam board systems use rigid foam panels with a waterproof coating on both sides, which are installed directly onto the shower walls and floor.
Advantages: Provides insulation in addition to waterproofing. Lightweight and easy to cut to size. Fast installation with pre-formed panels. Steps: Prepare the shower cavity. Cut foam boards to size and fit them to the walls and floor. Attach the boards using thin-set mortar or screws and washers. Seal all seams and joints with waterproof tape or sealant. Allow the adhesive and sealant to set before tiling.
Materials: Foam board panels (e.g., Wedi, Kerdi-Board).Thin-set mortar or appropriate adhesive. Waterproof tape or sealant.
Description: Polyurethane membranes are highly flexible, durable waterproof coatings that form a seamless barrier.
Advantages: Extremely flexible and resistant to movement and cracking. High resistance to chemicals and weathering. Suitable for various substrates, including concrete, wood, and metal.
Steps: Clean and prime the substrate. Apply the polyurethane membrane with a brush, roller, or spray. Ensure full coverage and proper thickness. Allow curing as per manufacturer recommendations before tiling.
Materials: Polyurethane waterproofing membrane. Brush, roller, or sprayer.
Each waterproofing method has its own benefits and is suitable for different types of shower installations. The choice depends on factors like the substrate material, desired durability, ease of application, and budget. Proper surface preparation and adherence to manufacturer guidelines are essential for achieving a reliable waterproof barrier in a shower cavity.
Copyright © 2025 MyCustomBathroom.net - All Rights Reserved.
Powered by GoDaddy